Search the Site
Centre open 11:00am - 6:00pm today
-
Monday
9:00am – 7:00pm
-
Tuesday
9:00am – 7:00pm
-
Wednesday
9:00am – 7:00pm
-
Thursday
9:00am – 9:00pm
-
Friday
9:00am – 9:00pm
-
Saturday
9:00am – 7:00pm
-
Sunday
11:00am - 6:00pm
Easy Easter Baking

Easter is one of the most blooming lovely and delicious times of the year. With easter baskets brimming with chocolatey delights, treasure hunts for goodies and the excuse to indulge in sweet bakes, family dinners and celebrations galore. We’ve rounded up our easiest Easter bakes for the kids to get their paws on! Gift them to somebunny special or devour them all by yourself, we aren’t judging!
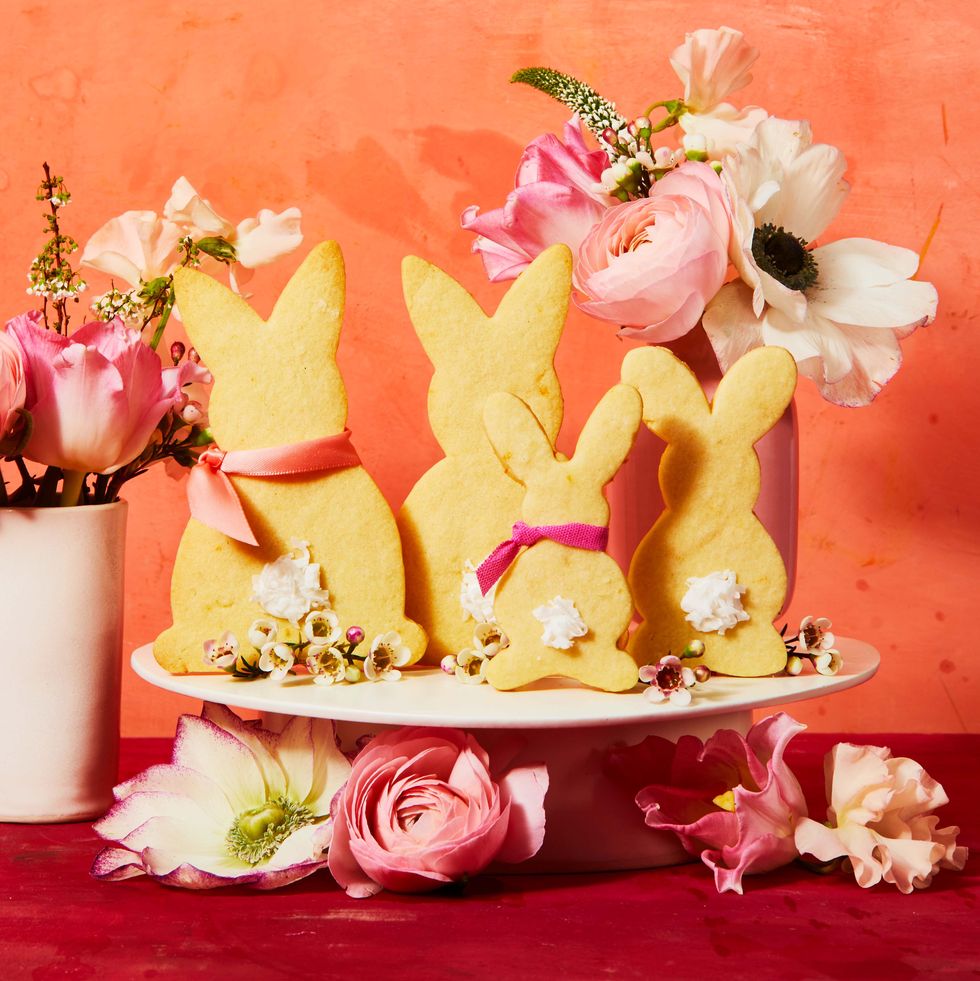
Lemon Bunny Biscuits
Decorate these bunnylicious cookies with icing and, before it has set, sprinkle on shredded coconut to create cute little tails.
You’ll Need:
550g of all-purpose flour
1/2 tsp. of baking powder
1/4 tsp. of salt
200g of unsalted butter, at room temperature
150g of granulated sugar
1 tbsp. of grated lemon zest
1 large egg
1 1/2 tsp. of pure vanilla extract
Bunny-shaped cookie cutters or stencil
Royal icing and shredded coconut, for decorating
Directions:
- In medium bowl, mix together flour, baking powder, and salt.
- In large bowl, using an electric mixer, beat the butter, sugar, and lemon zest on medium-high speed until light and fluffy, for about 3 minutes. Reduce speed to medium and beat in the egg, and then vanilla.
- Reduce mixer speed to low and gradually add flour mixture, mixing just until incorporated. Shape the dough into 4 disks and roll each between 2 sheets of baking paper to 1 inch or 2.5 cm thick. Chill until firm, for 30 minutes in the fridge or 15 minutes in freezer.
- Heat oven to 175°C. Line baking sheets with baking paper. Using floured cookie cutters, cut out the biscuits. Or draw out a stencil and carefully cut the dough around your bunny shape. Place carefully on prepared sheets. Reroll, chill, and cut the scraps into more biscuits.
- Bake, rotating positions of pans halfway through, until biscuits are light golden brown around edges, for 10 to 12 minutes. Let cool on sheets 5 minutes before transferring to wire racks to cool completely.
- Pipe small dollop of icing near base of each cookie for tail and sprinkle with coconut to finish
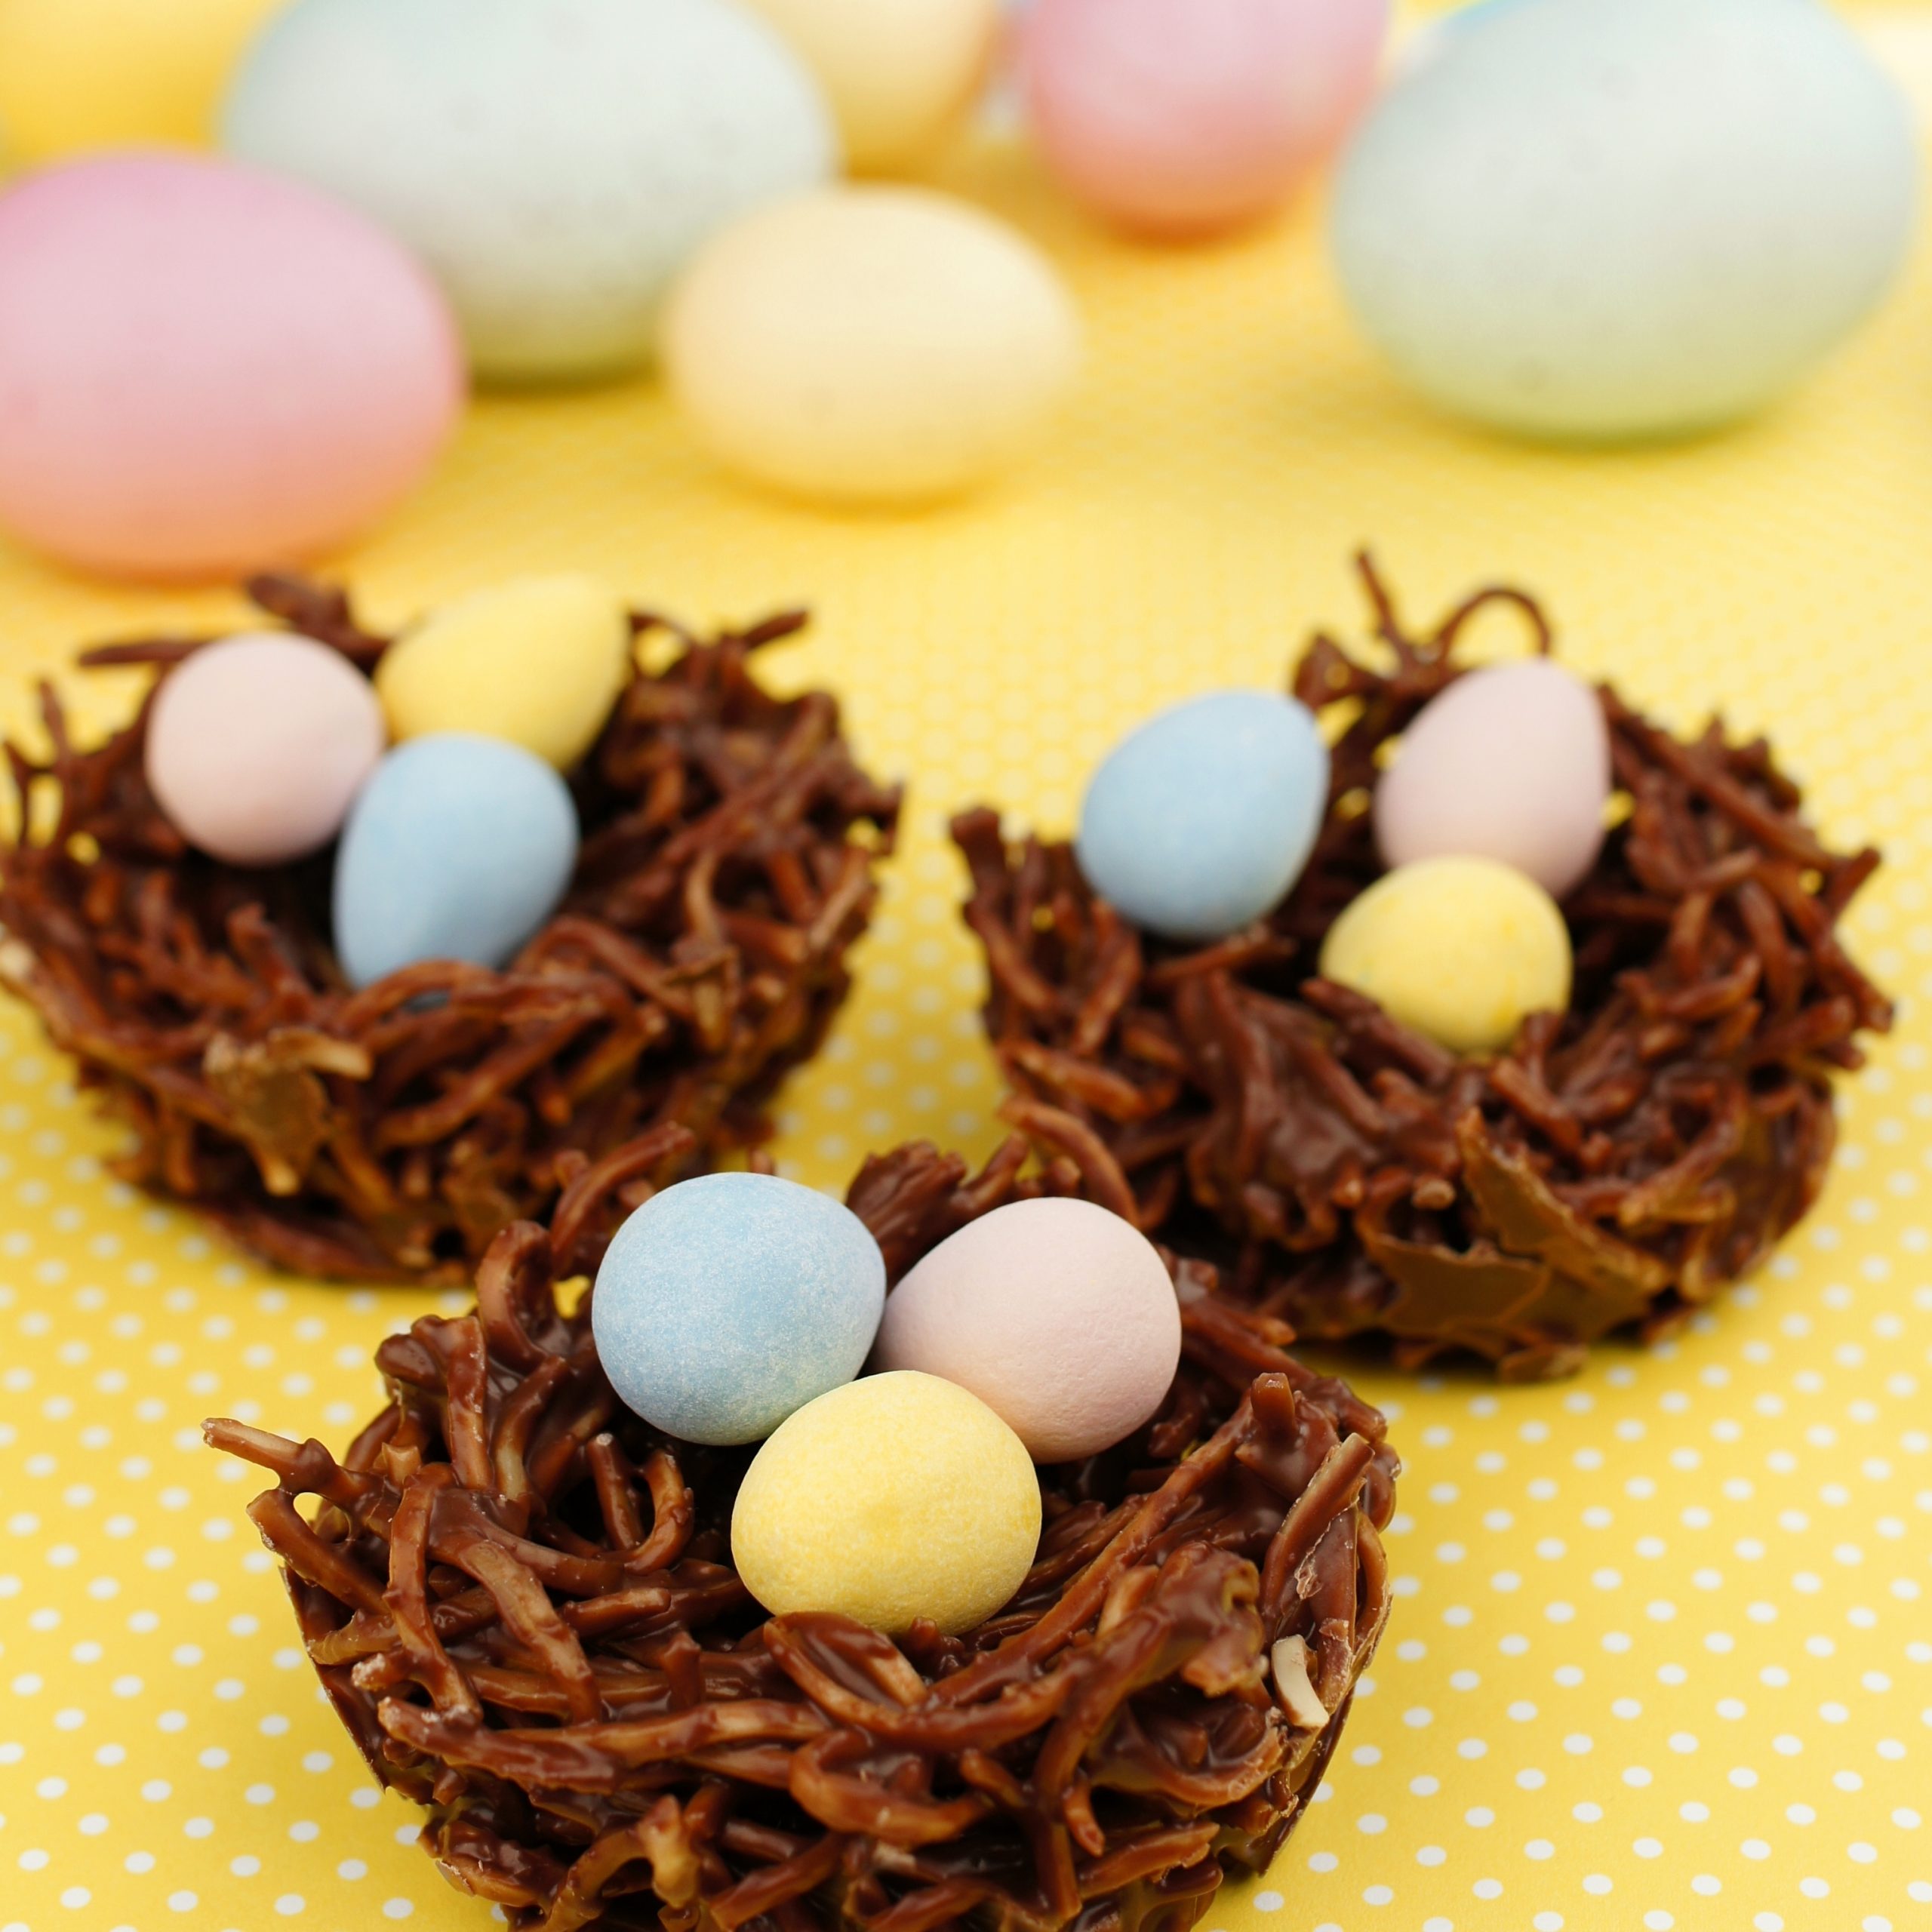
Easter Egg Nests
You’ll only need three ingredients for these sweet and simple treats. The kids can act as chief baker here too.
You’ll Need:
200g of milk chocolate , broken into pieces
85g of shredded wheat , crushed
2 x 100g bags of Mini Eggs
Cupcake cases
Directions:
- Pop the chocolate in a small bowl and place over a pan of barely simmering water. When melted and runny, pour the chocolate over the shredded wheat and stir well until fully coated.
- Spoon the chocolate wheat into 12 cupcake cases and create a nest shape by pressing the back of a teaspoon in the centre. Place 3 Mini Eggs on top of each nest and then place in the fridge for 2 hrs until set.
- Let the feasting commence!
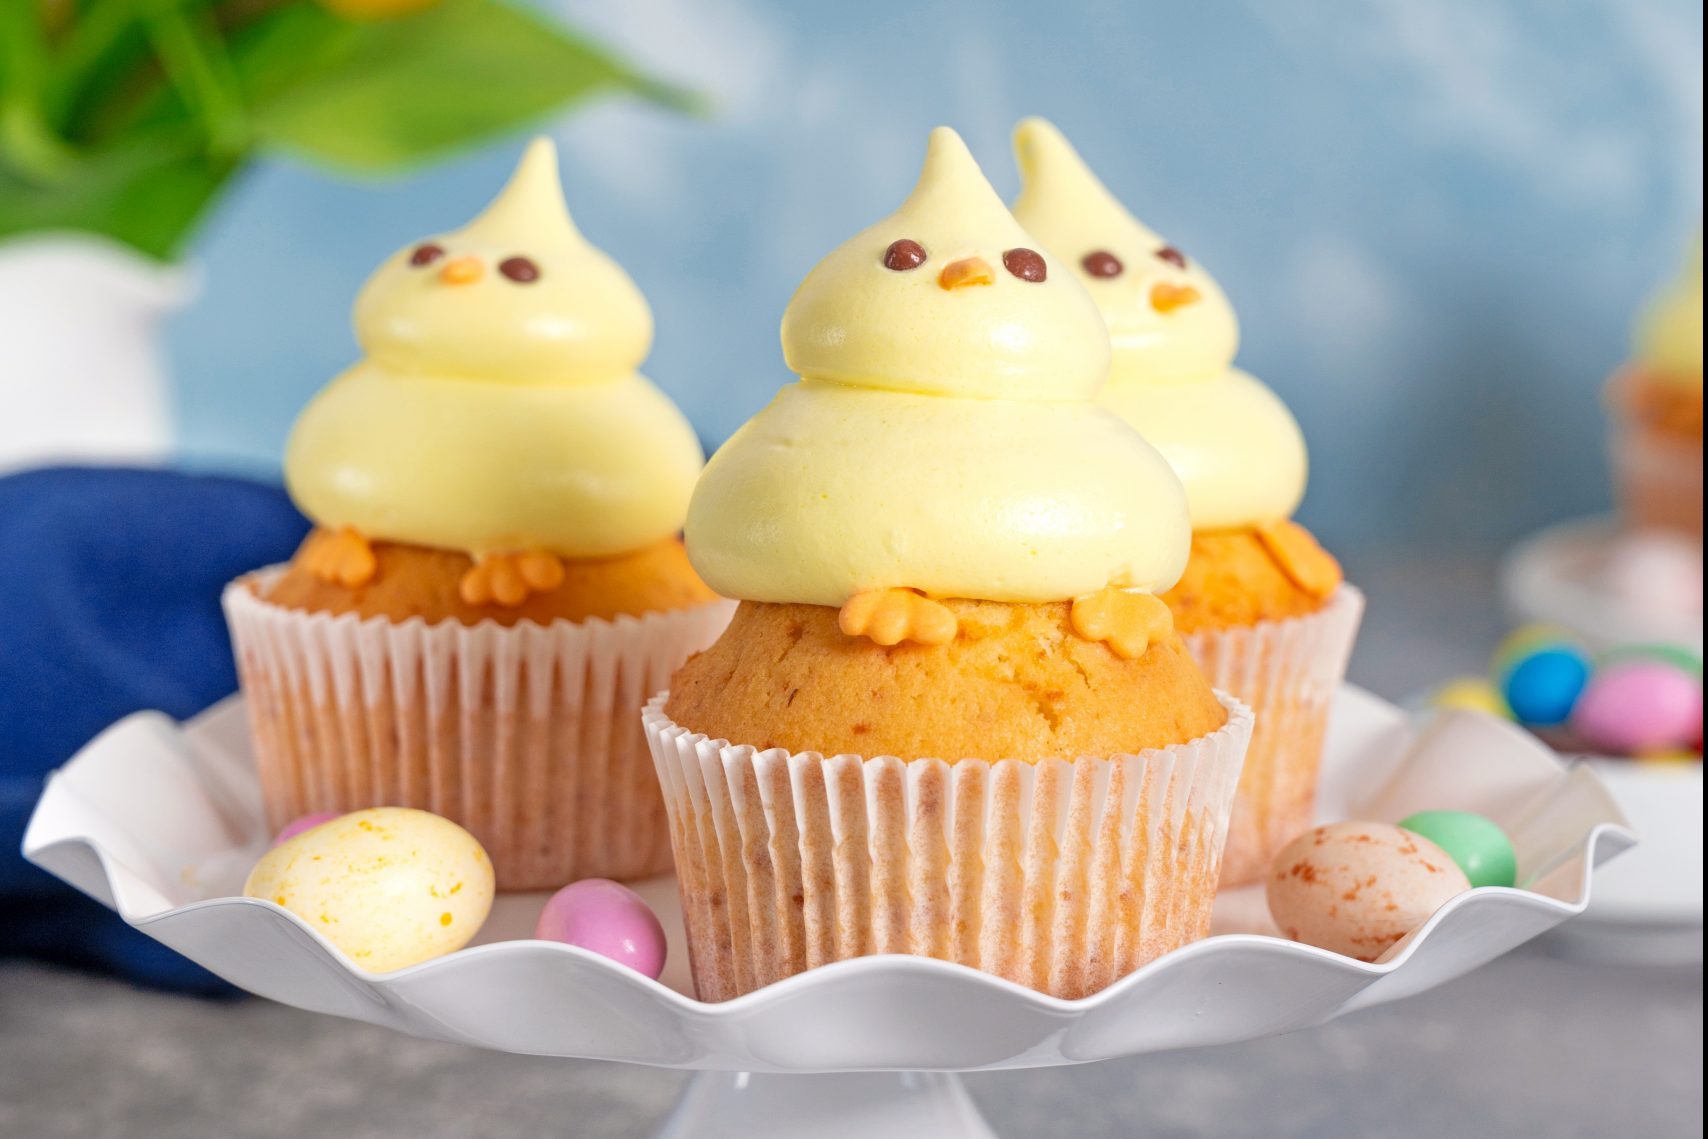
Chocolate Easter Character Cupcakes
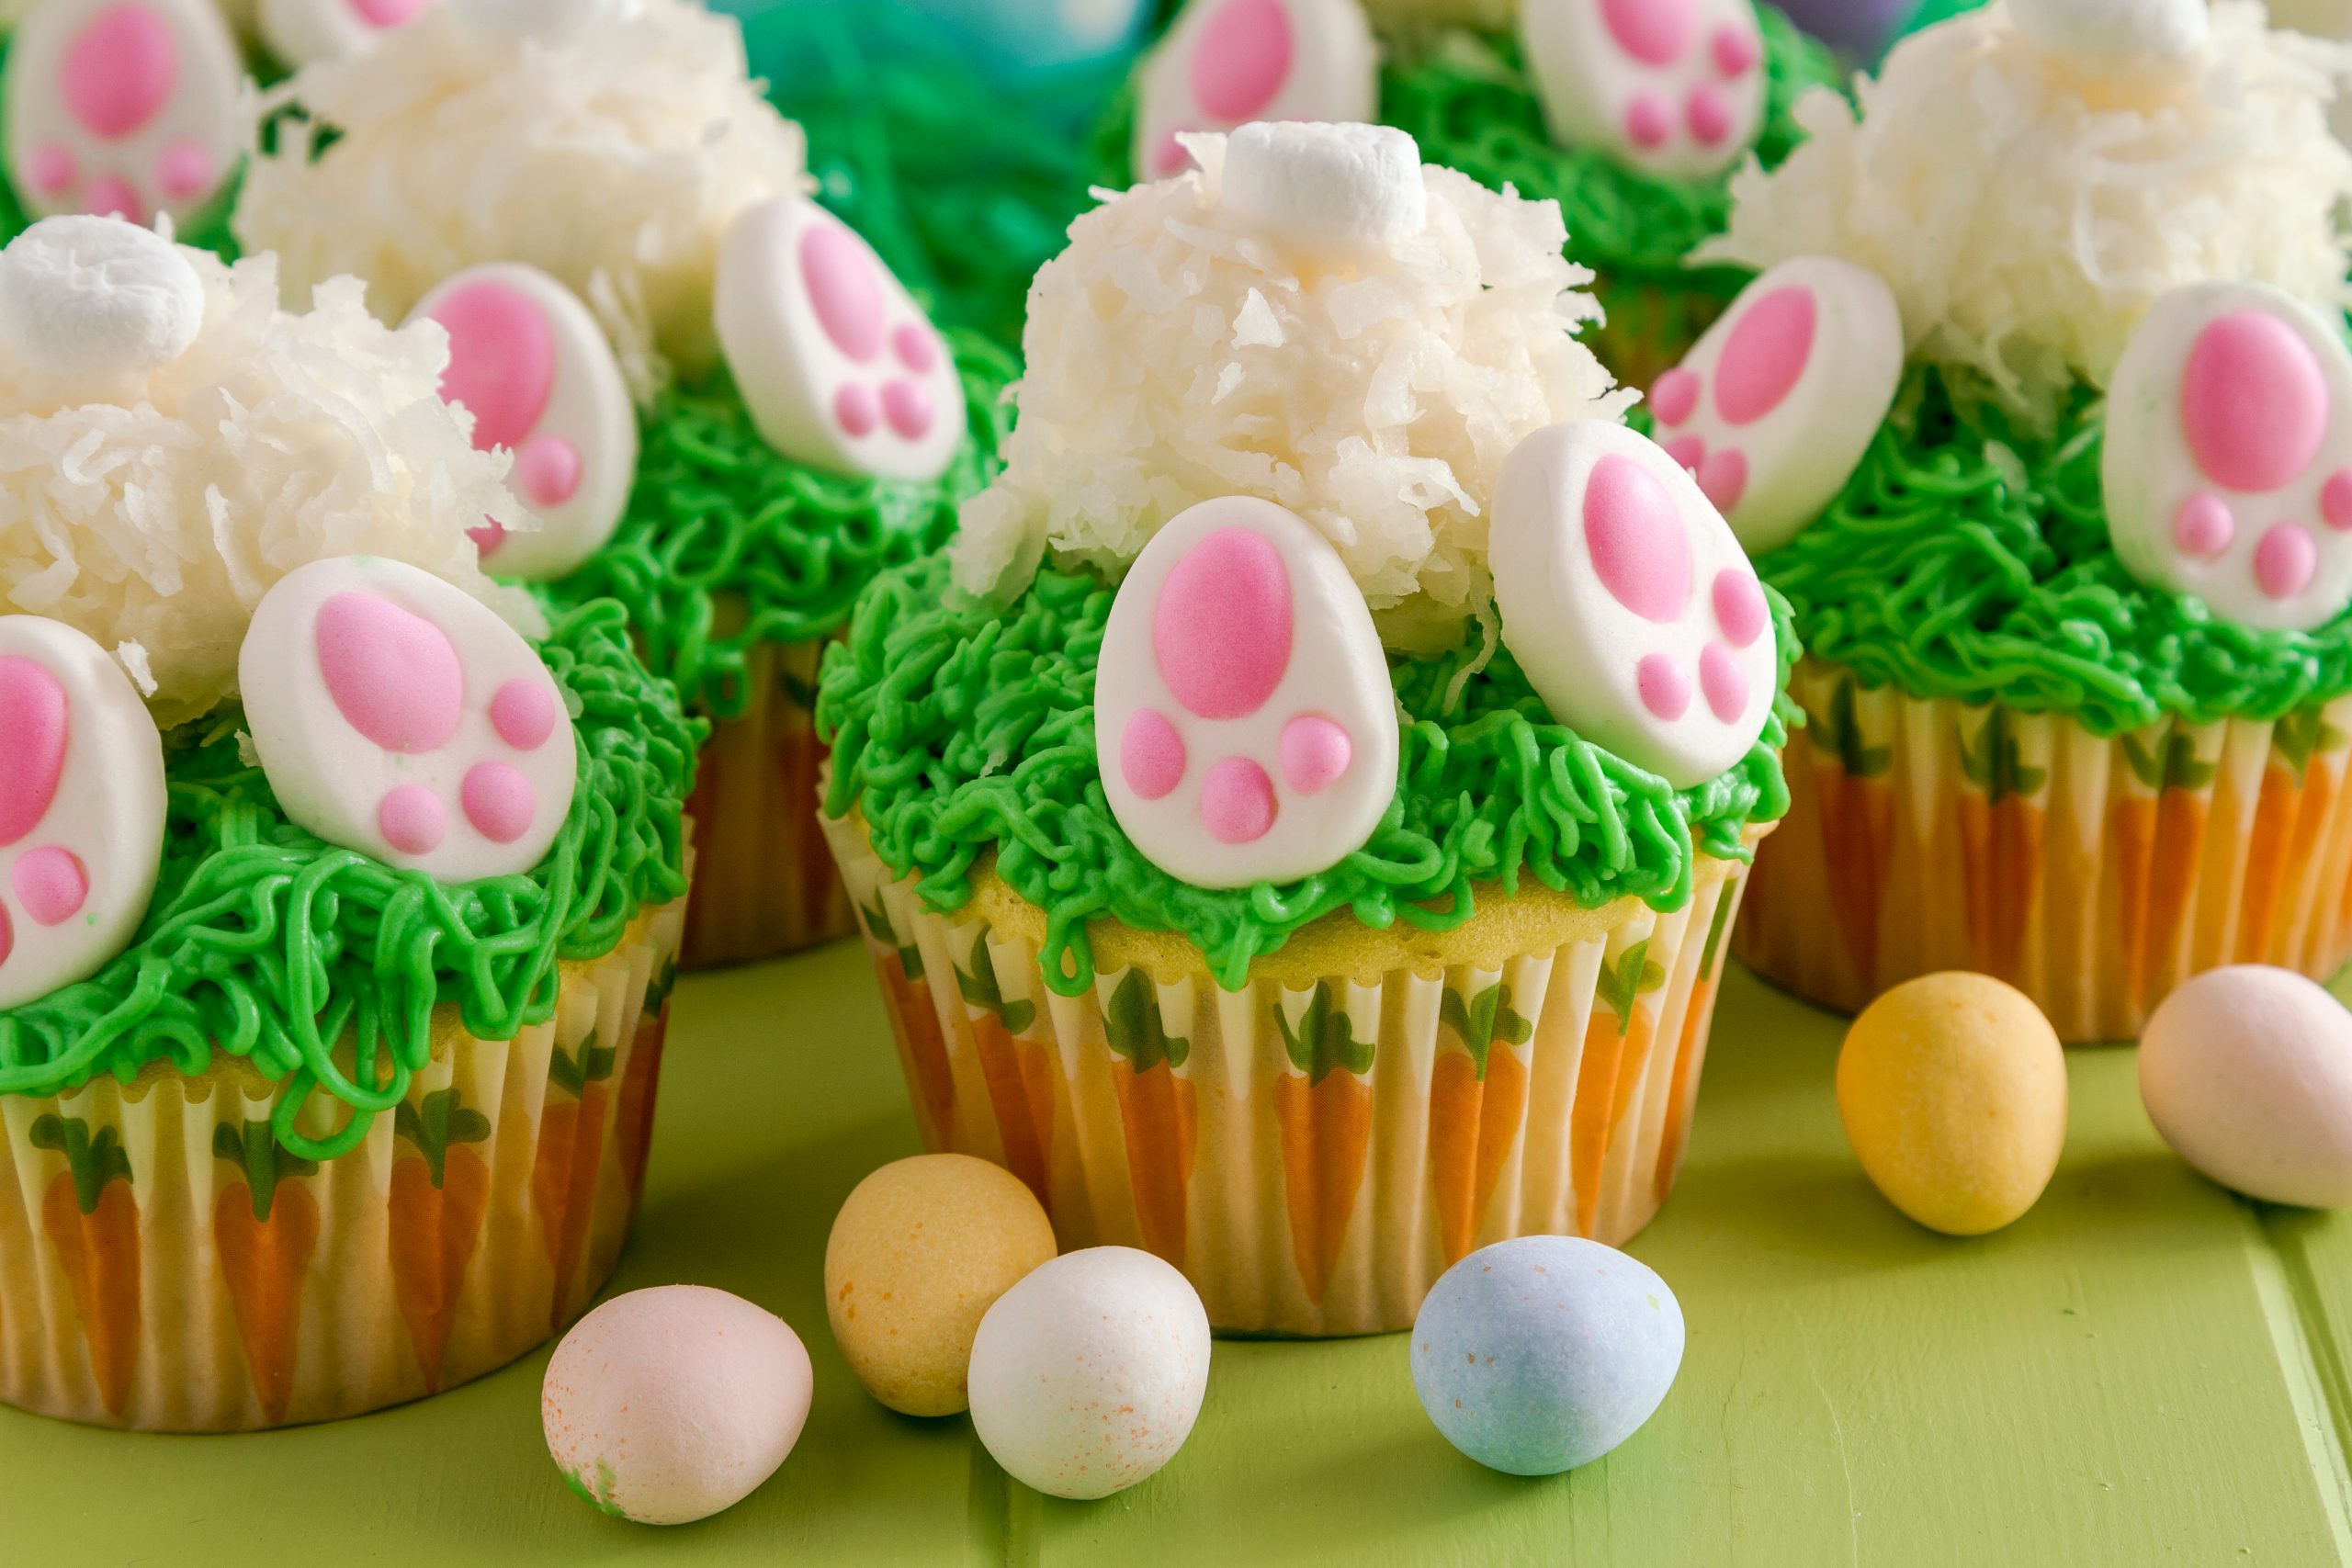
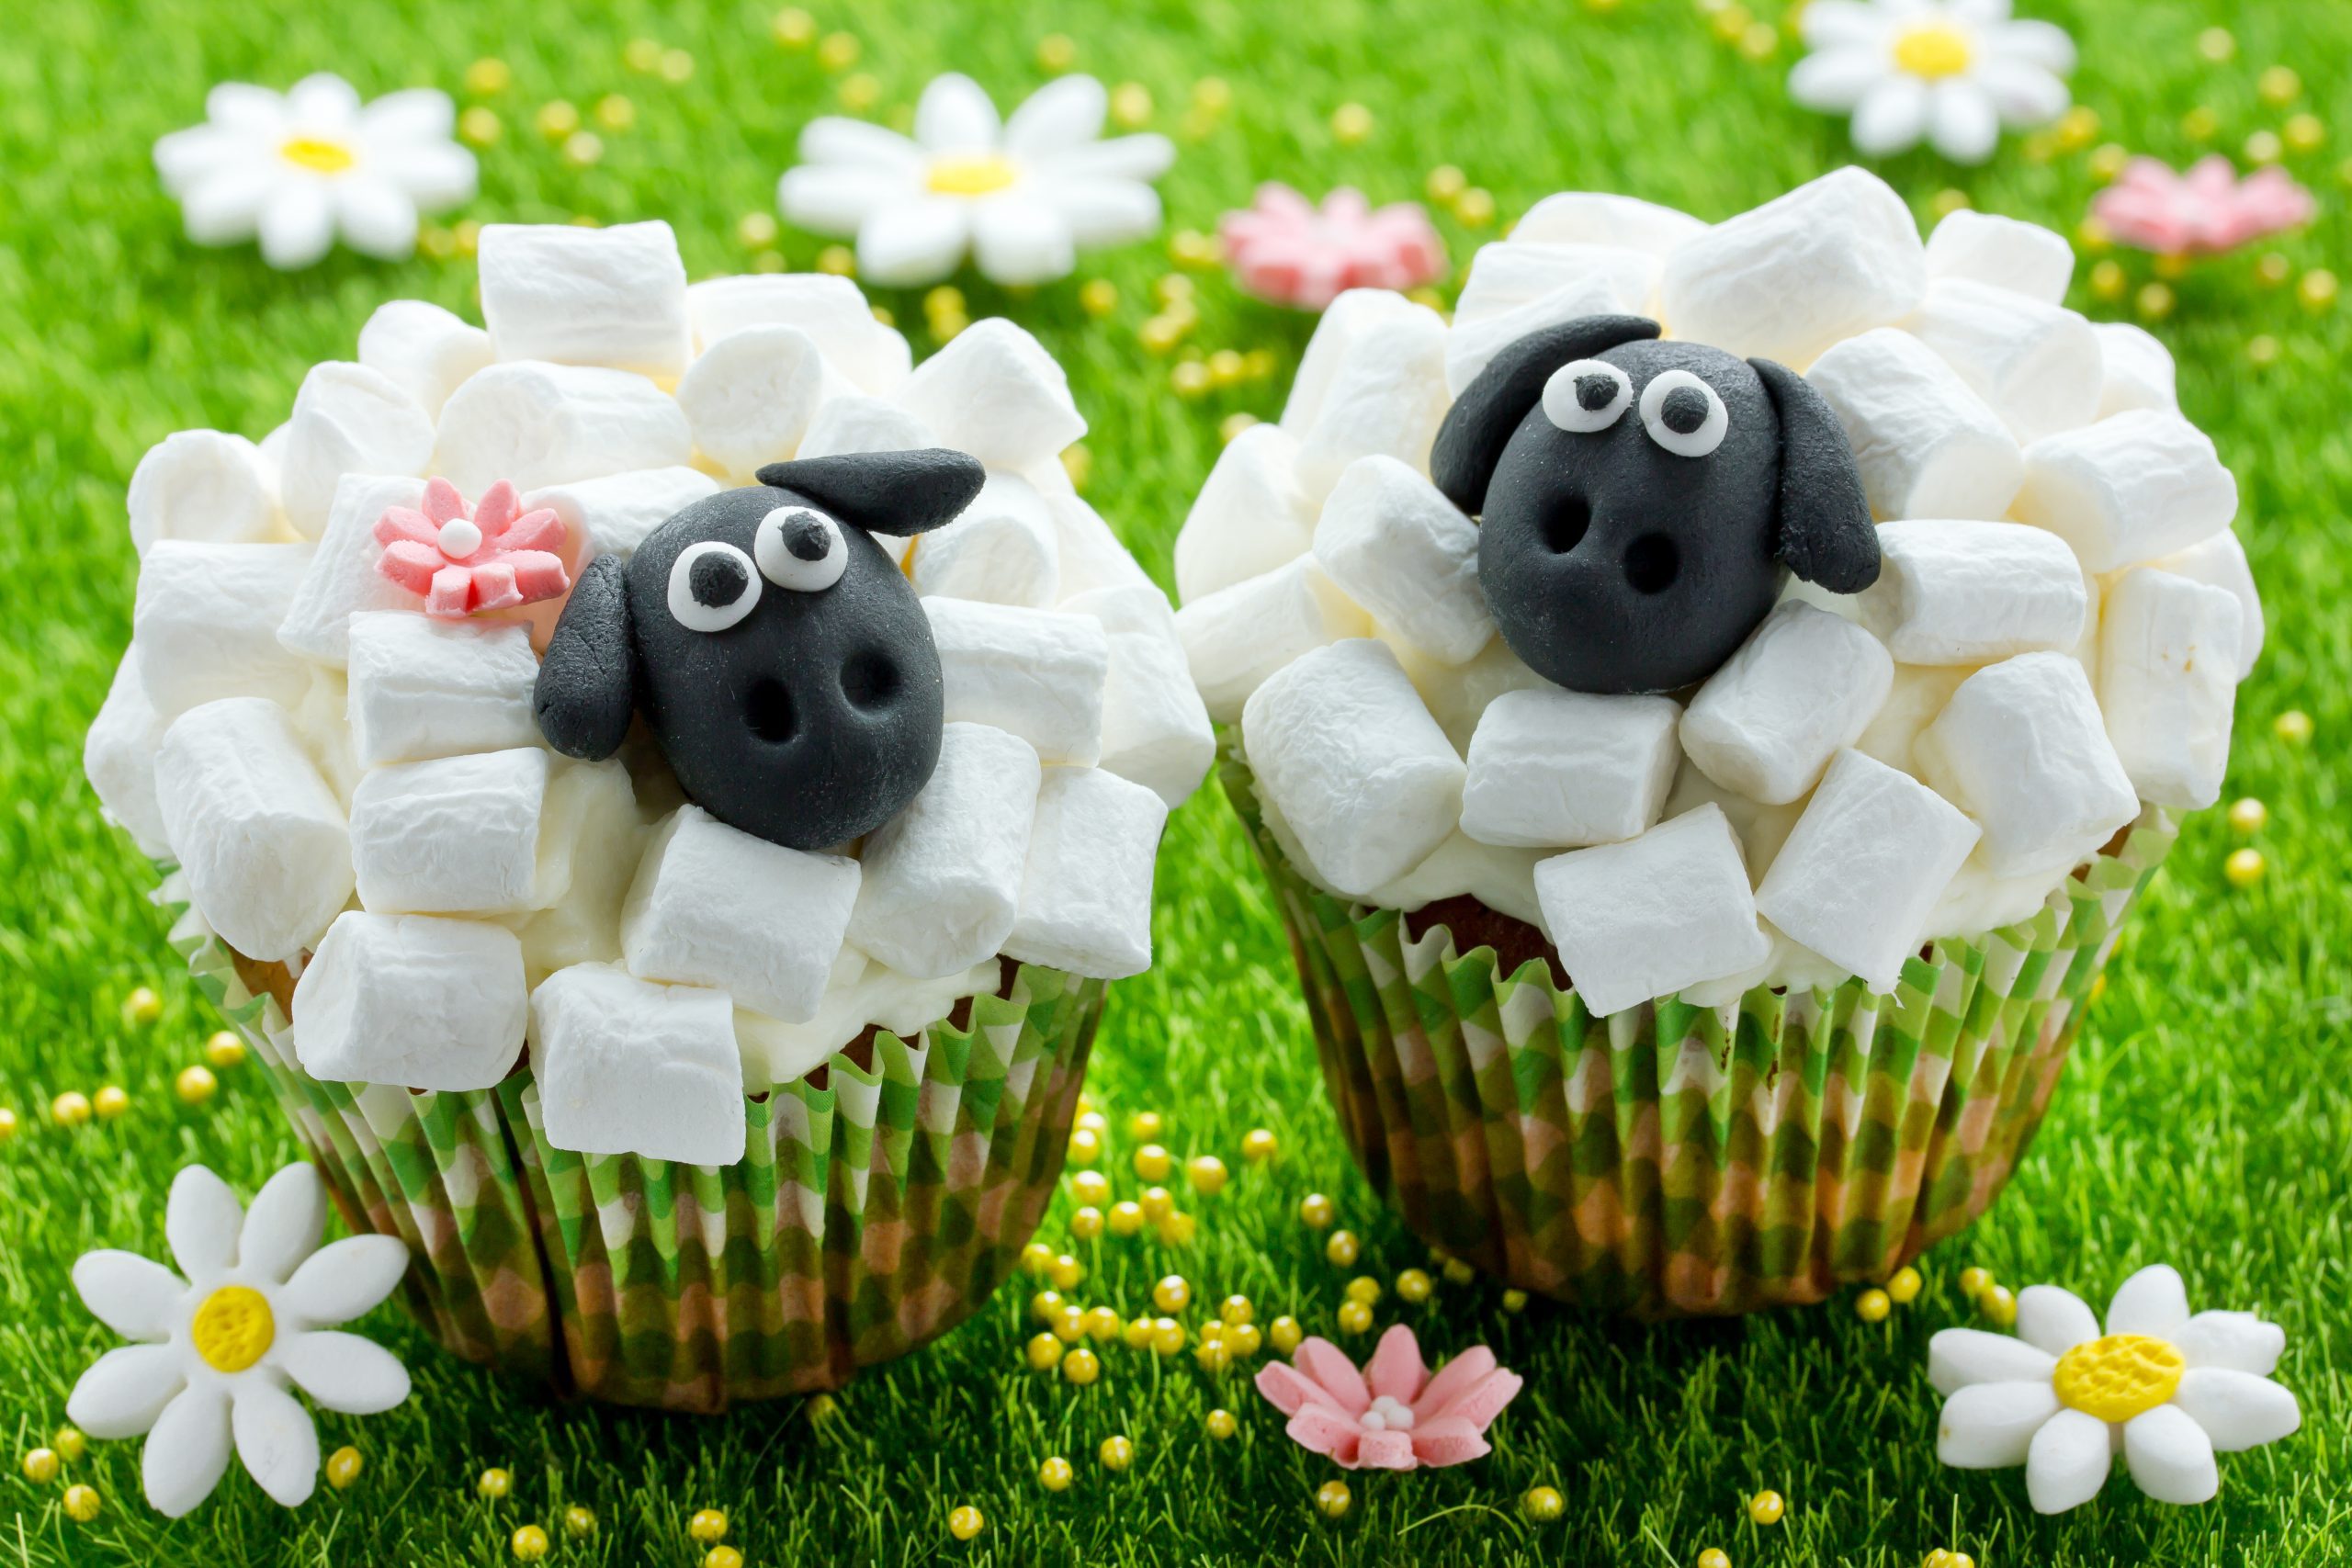
Let imaginations run wild as the kids create their own unique Easter characters for each deliciously chocolate bun topping! Create eggs, bunnies, chicks, sheep or flowers – they’re equally delicious!
You’ll Need:
140g of light brown soft sugar
100g of self-raising flour
50g of cocoa powder
1 tsp. of baking powder
2 large eggs
135ml of vegetable oil
4 tbsp. of milk
For the icing toppings:
300g of icing sugar
150g of softened unsalted butter
2 tbsp. of milk
250g of ready-rolled white fondant icing
Food colouring -orange, blue, yellow, pink and black
2 tbsp. of cocoa powder
1 pack of white mini marshmallows
Directions:
- Heat the oven to 180° Combine the brown sugar, flour, cocoa, baking powder and a pinch of salt into a large bowl.
- Whisk the eggs, oil and milk in a jug and slowly pour the wet ingredients into the dry, whisking until smooth.
- Line a 12-hole cupcake tin with paper cases. Bake for 20 mins until risen. Leave to cool in the tin.
- Make the icing. Use an electric whisk to beat the icing sugar and butter until pale and fluffy. Whisk in some of the milk to create a pipeable consistency, if needed.
- Decorate!
- Chick: Colour a small piece of premade fondant orange and another black by using a drop of food colouring. Colour a few tablespoons of the creamy icing yellow and spoon into a piping bag fitted with a large round nozzle. Begin by piping a yellow blob in the centre of the cupcake and a smaller one on top. Create eyes by rolling two small balls out of the black fondant and place on the chick’s body. Roll a small cone of orange fondant for the beak.
- Bunny: Beat cocoa and 1tbsp of milk into some of the buttercream icing and then spread over the cupcake. Place the plain icing into a piping bag with a large round nozzle and pipe a small blob on top. Stick a mini marshmallow on top of that to create the bunny’s tail. Use two small pieces of white fondant as the feet by shaping and flattening into ovals. Colouring a small piece of fondant pink, form two balls and six smaller ones. Press these balls into the flattened ovals in a paw-like pattern. Place the feet on either side of the rabbit’s marshmallow tail.
- Sheep: Colouring a piece of fondant black, shape a small piece into an oval. Use a skewer to press nostrils into the bottom end. Pinch two smaller pieces into ears and stick these on using a little water. Roll two small balls of white pre-made fondant and two smaller black balls to make eyes. Cover the cupcake with a layer of plain icing and fix the face in the middle. Surround with mini marshmallows for the woolly coat!
Happy baking!
Love,
The Front Row Team x
Search the site
Use the search bar below to search through Stores, Events, News and Pages.
